The fun bit in dyeing cloth is seeing the outcome for the first time. One has to wait at least 4 hours, since that is how long the dye remains active. Usually, however, I wait overnight with the unproven to me, but conventional expectation that the dye batch will be better (more intense? more permanent?). If there is a chemical change that occurs after 4 hours, then somebody enlighten me please!!
With the combination of both shibori resist folding and ice dyeing techniques, I was in an overnight baited breath of waiting (and with baited breath she waits). I was pleased with the result.

Photo 1. Result of hand dyeing using shibori resist folded cotton followed by the “ice dyeing” technique. The cloth was pre-processed in a soda ash soak (very high pH, ~10) to activate the cellulose fibers prior to dyeing.
The next day I did a repeat, more-or-less, using heavy linen which is planned for napkins to match the placemats. Since nothing was measured and the cloth type and weight was different, I figured the outcome would be related but not identical; I was right.
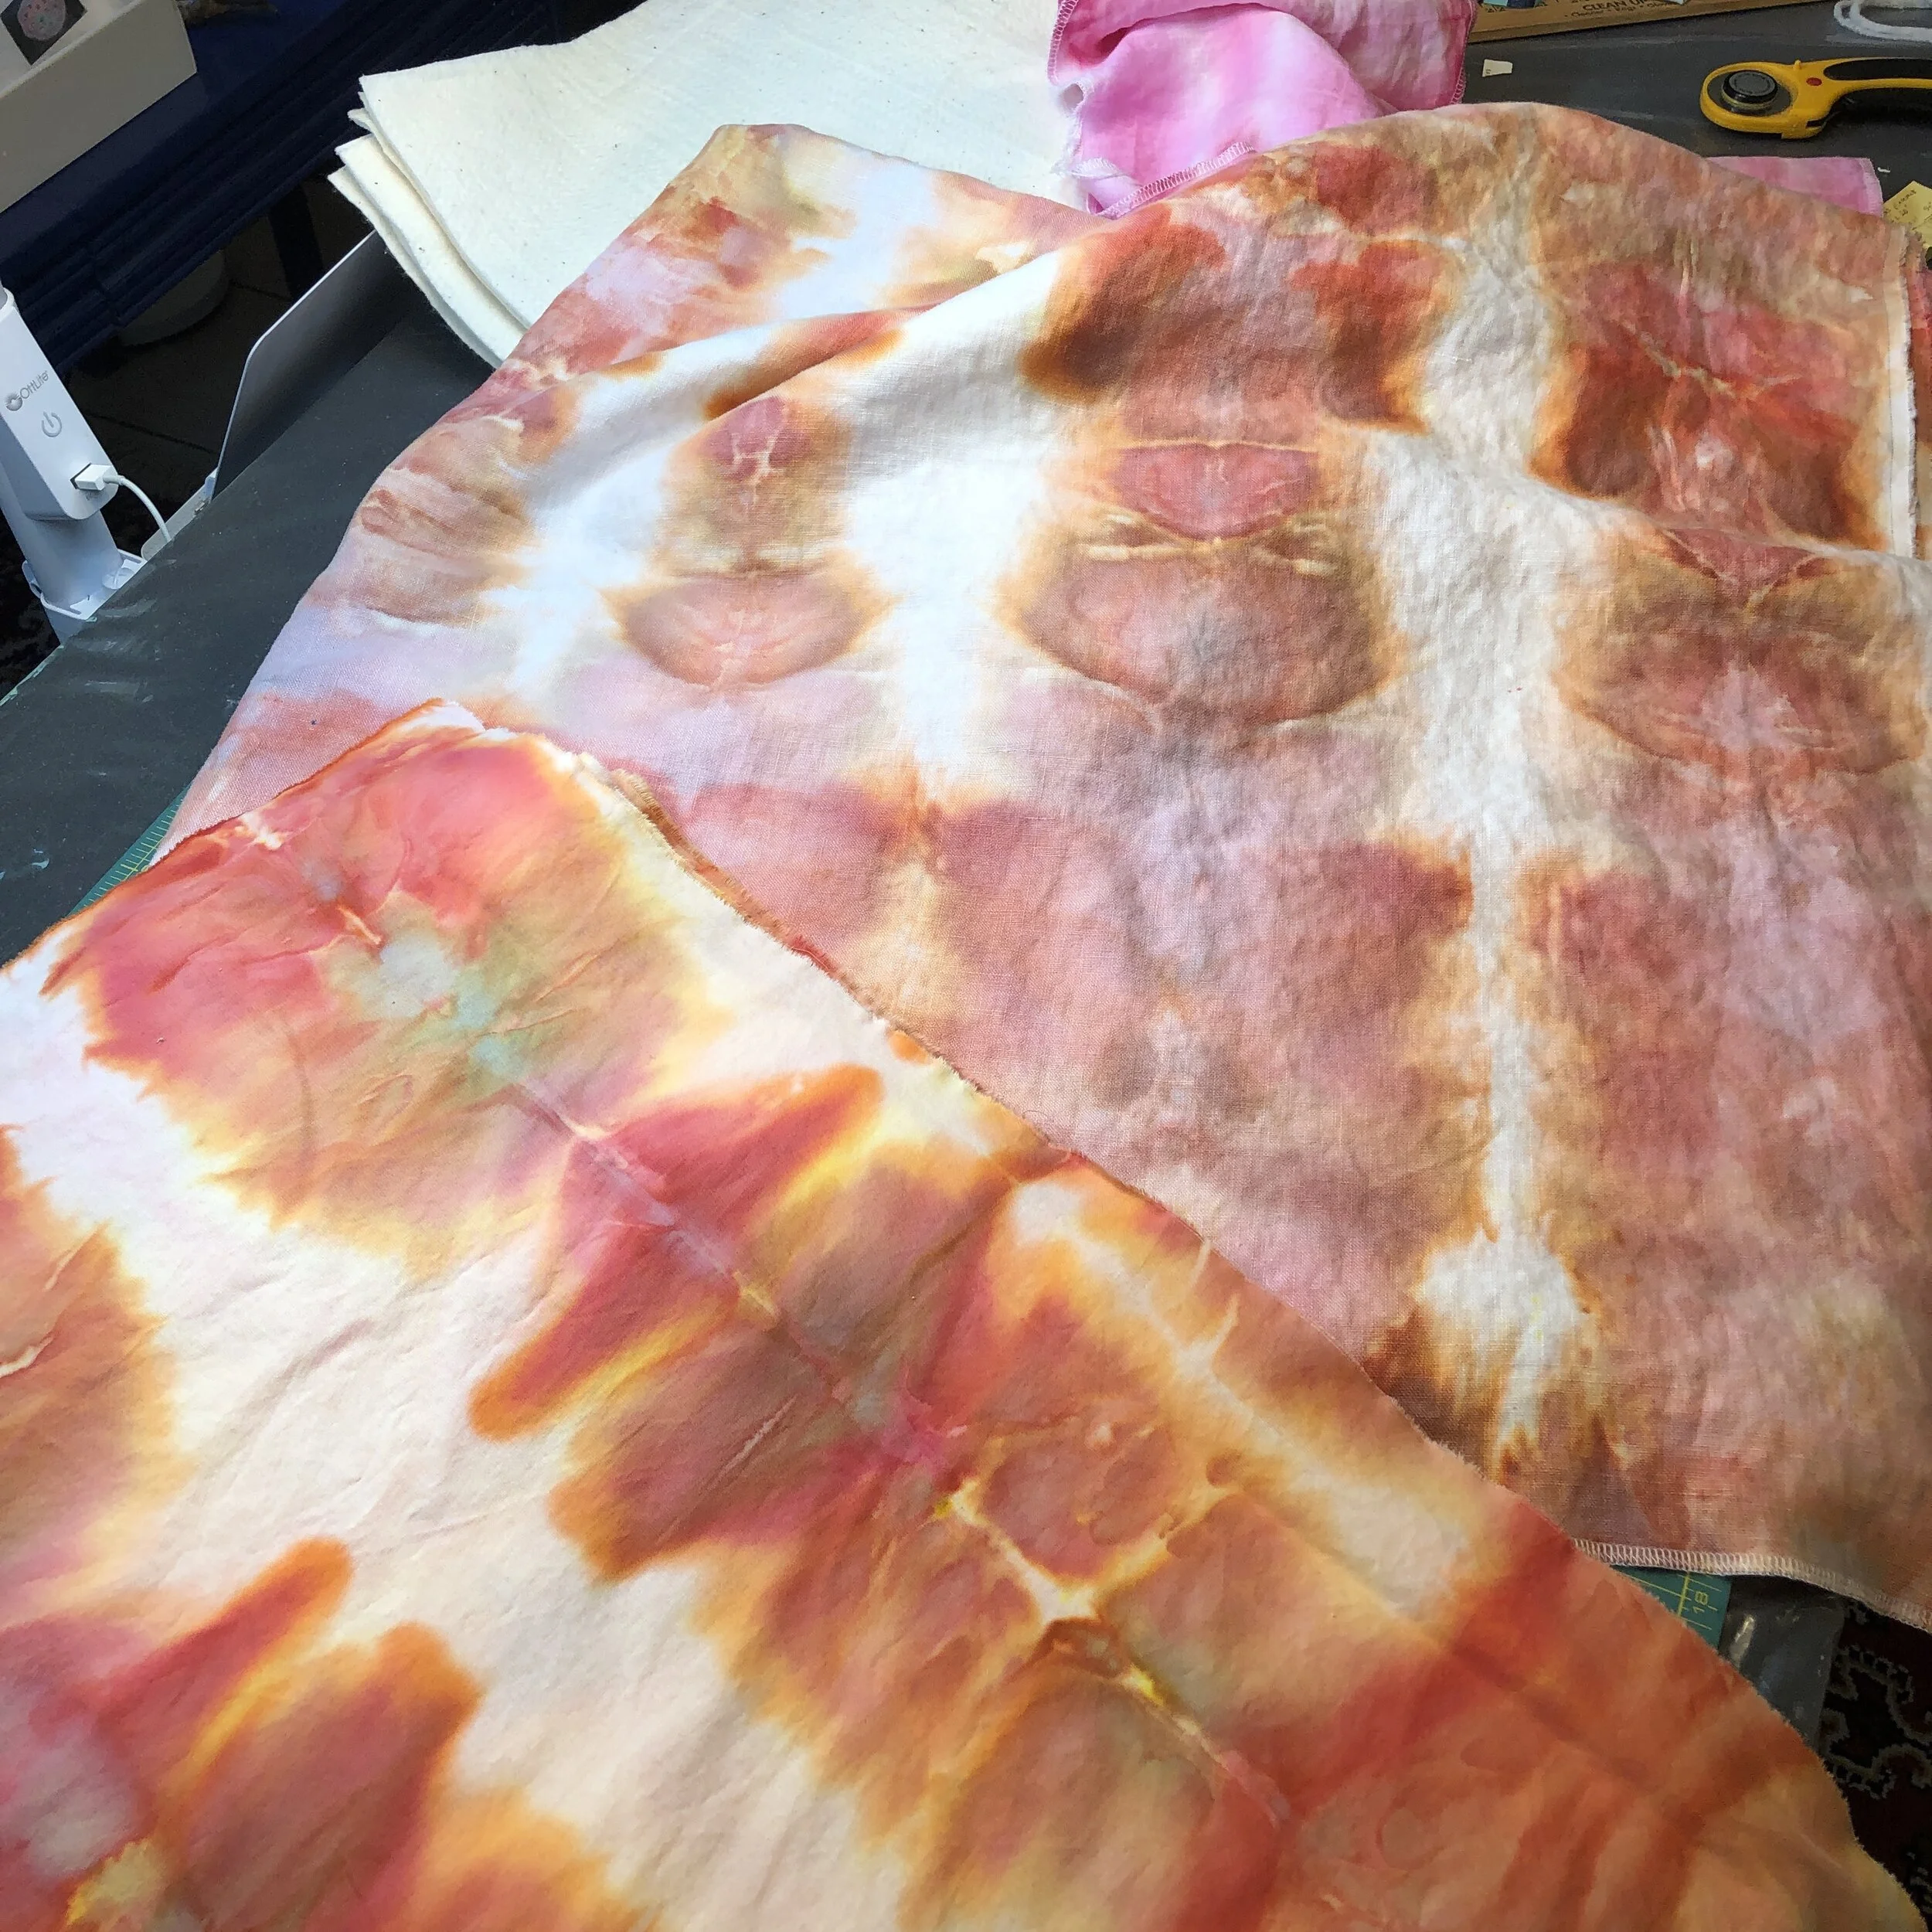
Photo 2. The cotton sheeting is in the foreground and the linen towards the back, at the top of the photo. The colors are more mellow on the linen compared with the cotton sheeting and I suspect that I used touch more fuchsia on the linen.
The idea of a blue cloud silkscreened onto the white parts of the cotton appeared in my mind as ideal. The cool blue would be nice next to the warm colors of the sunrise. The sky is blue with white clouds, but a blue cloud would be symbolic of the whole sky. And, the blue cloud felt calming visually.
But first, a lot of cutting/ ripping along the grain line was required for the fabric prior to sewing. Brute force cutting on a mat for the linen was in order for the napkins to take shape. The back and fronts of the placemats would be the same fabric with only the fronts showing a cloud. Lastly, matching cuts of cotton batting was left to prepare. An intermediate stage in the work is shown in Photo 3.

Photo 3. Placemats and cotton batting cuts finished. Just the linen left to cut.
Moving aside the stacks of fabric, I set up the space to silkscreen clouds using the first silkscreen that I ever prepared. Karen Bell loaned the frame, and I envisioned a pond, lotus, waterfall, and cloud scene based on our koi pond in the front yard.
Here were some of the first pieces that I ever prepared using this silkscreen. I hand quilted probably six of them, and gave one each to my sisters and I kept two. See the cloud? See the lotus? I have used both individually on t-shirts and other pieces since then.
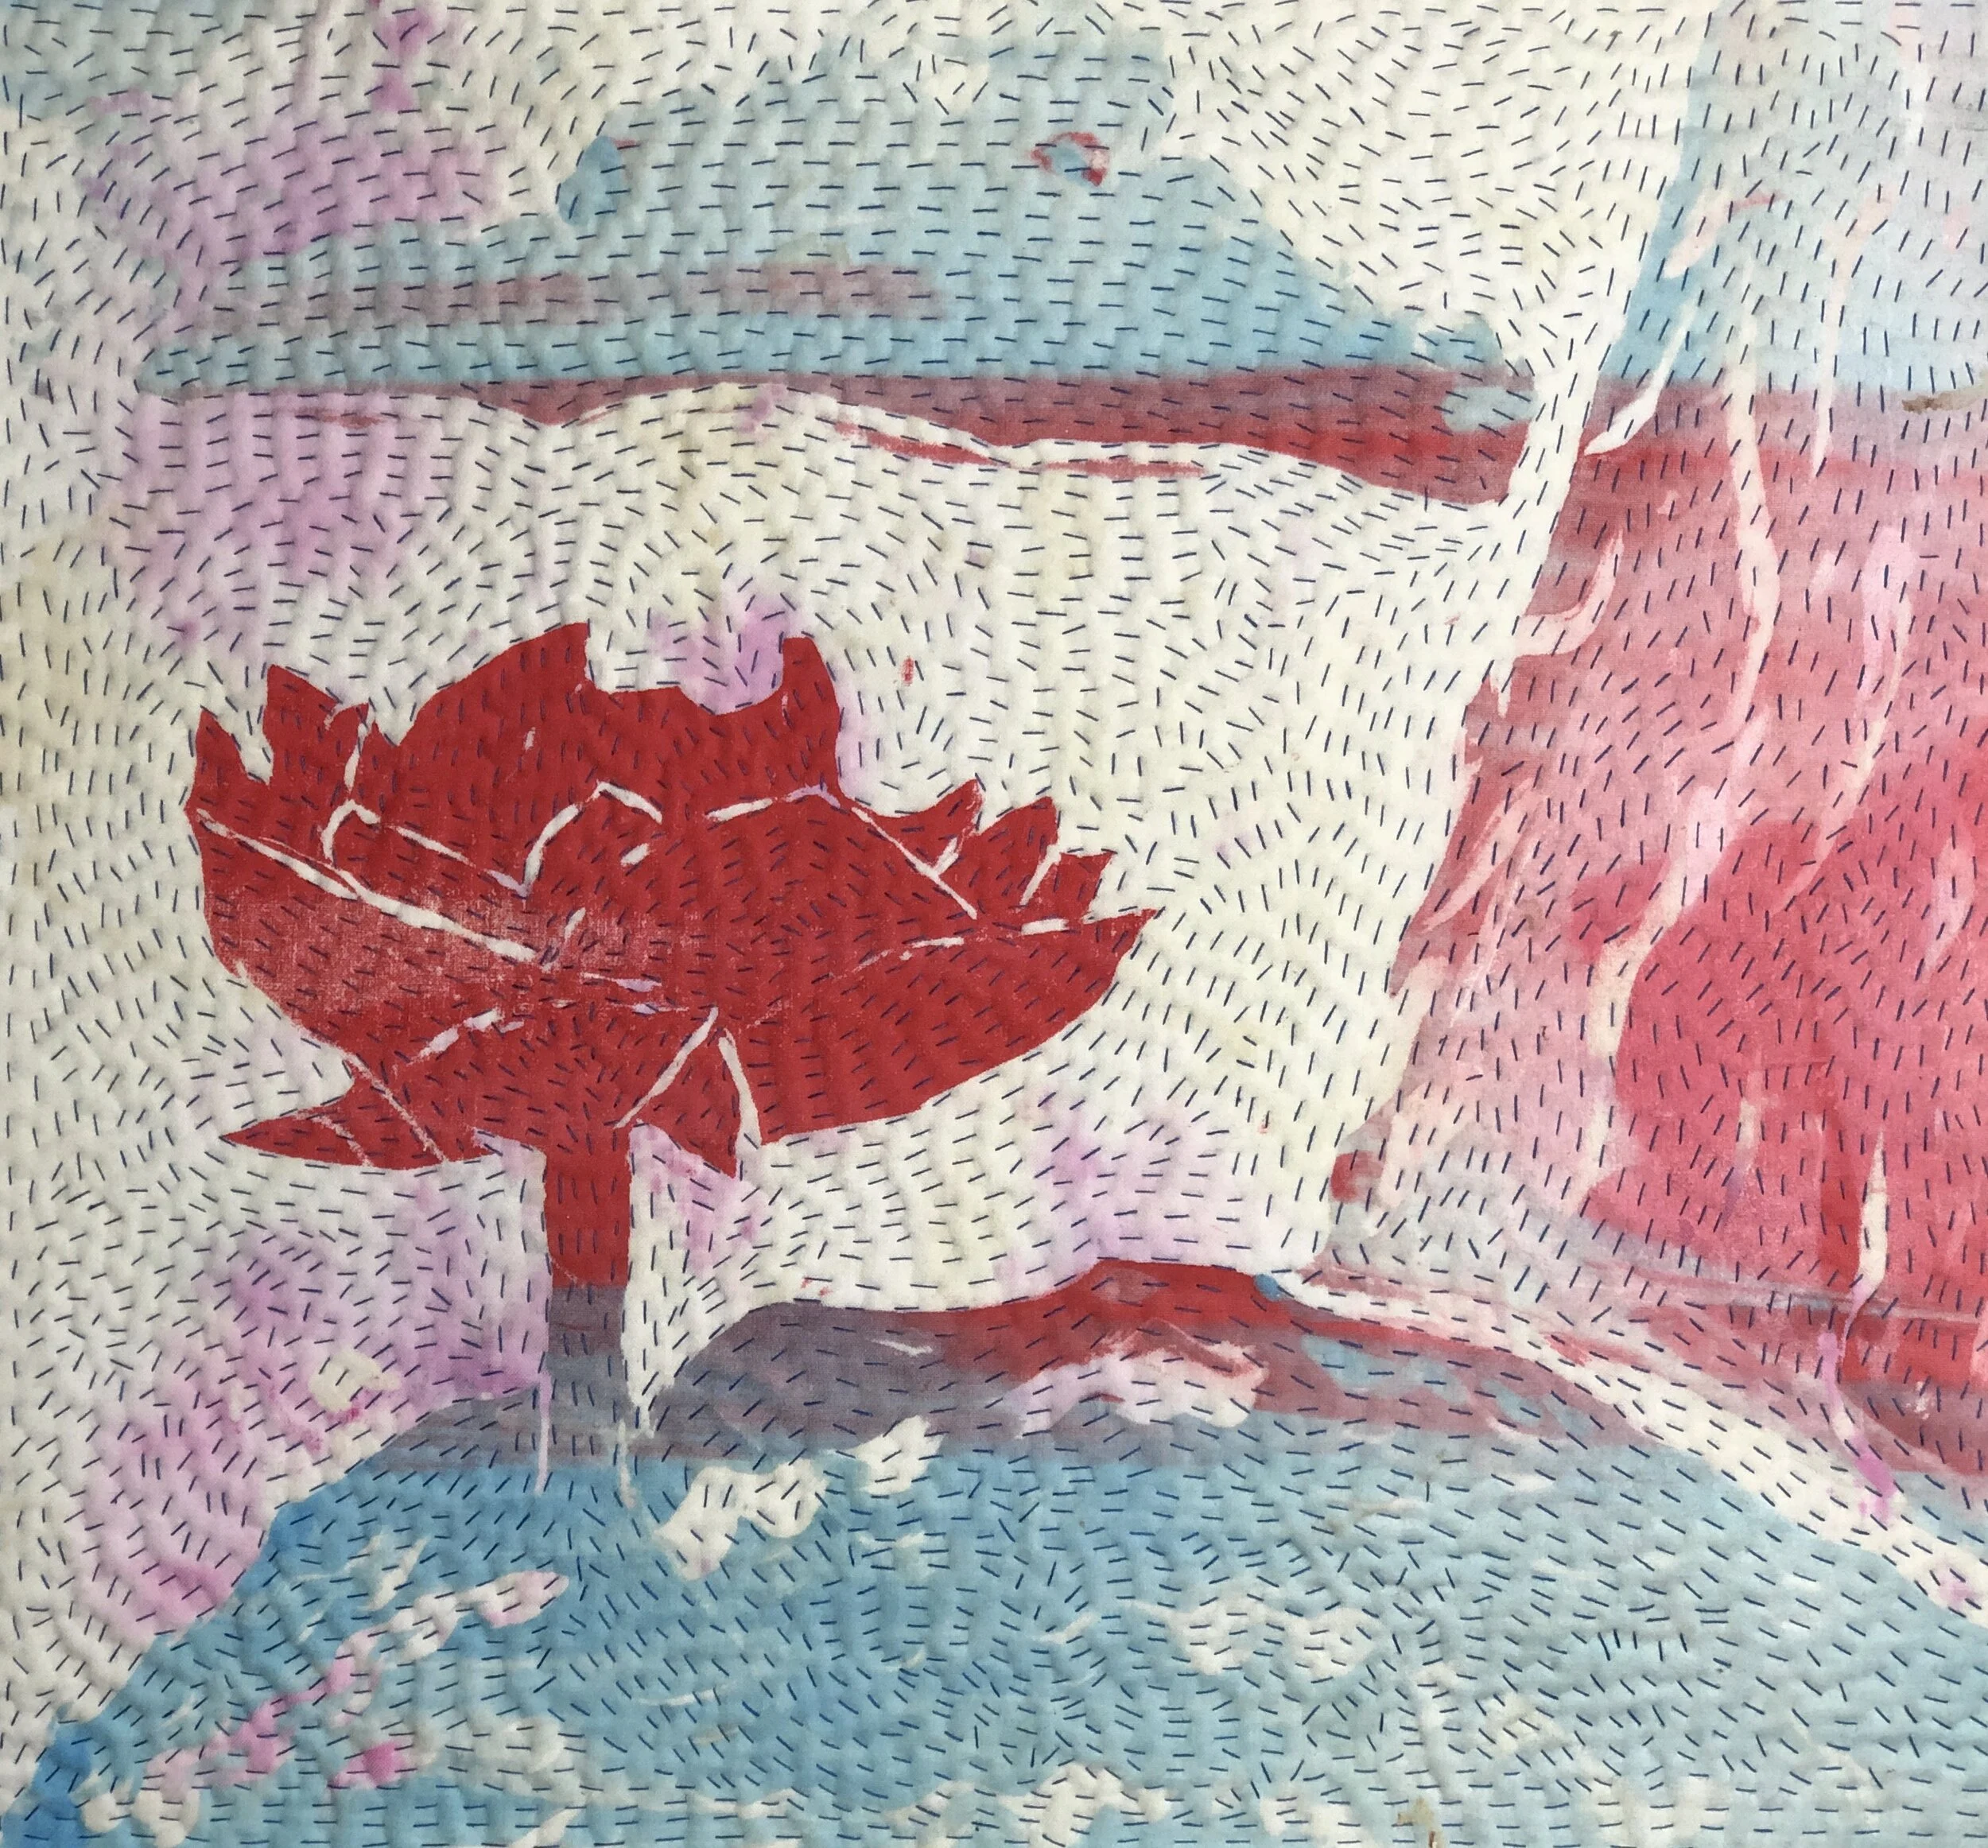
Photo 3. An early piece I did maybe 3-5 years ago???? I can’t remember. Hand quilted.
At the time that I prepared this early silkscreen, we had the most spectacular lotus plant growing in our koi pond in the front yard. I will definitely tell you more about that fabulous lotus plant in another blog! Here in Photo 4 is a picture of the silkscreen test run on spare fabric and the result in Photo 5 while the cloud part of the fabric was still wet.

Photo 4. Silkscreen placed on spare fabric in preparation for silkscreening. Masking tape blocked all but the cloud portion of the silkscreen.

Photo 5. Two practice pulls were performed prior to silkscreening the cut pieces of cloth. The blue appears darker than in the final since the fabric is still wet.
I cleared a 10’ long table and proceeded to silkscreen 12 pre-cut tops for the placemats and layered them between plastic overnight to prevent drying while the dye finished reacting (batching).
The next day consisted of washing, ironing, layering top, bottom, and cotton batting, stitching, then finally reversing and ironing.

Photo 6. Three sides and part of the forth side at the end were stitched and then the layer piece turned inside out to reveal the front and back with the cotton batting between hidden.

Reversing finished and then they were ironed. Now the placemats are ready for stitching the edges and designing the quilting pattern!
One dozen placemats partially finished. Next blog I will show you the finishing touches on both napkins and placemats and my thoughts as I designed the quilting pattern: thread color and pattern.